

Published 2026-10-15
How to Set Up a Wedding Photo Booth with Printing
A photo booth is one of the things guests remember from a wedding, and it does not have to be rented. With a Windows PC, a webcam, a screen and a photo printer, Digital Center's built-in Photo Booth gives you a do-it-yourself wedding booth: guests pose, get a printed strip to take home or put in the guest book, and save the same picture on their phone with a QR code. This guide walks through a wedding setup from the equipment to handing the pictures to the couple the day after. For the general setup, see how to set up a photo booth for a party, and for the full overview the photo booth page.
Which edition you need
What you need
- A Windows PC running Digital Center. A small PC or a laptop is enough.
- A webcam. A good USB webcam gives better pictures in the evening light than a laptop's built-in camera.
- A screen. A touchscreen is the easiest for guests, and both portrait and landscape screens work. A TV works too, with the PC's mouse or keyboard nearby.
- A photo printer, connected to the PC with a cable or over the network, and enough paper and ink for the evening.
- Light. A lamp or a small light pointed at the spot where guests stand makes a bigger difference than any setting.
- A WiFi network that guests can join, if they should save the pictures on their phone.
Step 1: Set up the corner
Choose a spot with a calm background - a wall, a curtain or a backdrop - and room for a group of four or five. Place the webcam at about eye height, above or below the screen, so guests look into it while they look at themselves. Put the light in front of the guests, not behind them.
Plug in the webcam and the printer and check that Windows can print a test page, before the wedding day. Then open Digital Center and the Photo Booth center from the home screen. The live camera image appears.
Step 2: Set the camera
Go to Administration and choose Photo Booth. In the Camera section:
- Picture orientation - Landscape or Portrait. Use portrait for a standing screen.
- Rotate picture - if the camera has to be mounted sideways or upside down.
- Mirror - guests place themselves most naturally when the screen acts like a mirror. Mirror the view, save normally keeps the saved picture the right way round, so a sign with the couple's names reads correctly on the print.
- Picture quality - Standard, High or Maximum. Higher gives sharper prints but needs a capable camera and PC; go back to Standard if pictures fail to appear.
Step 3: Decide what guests can choose
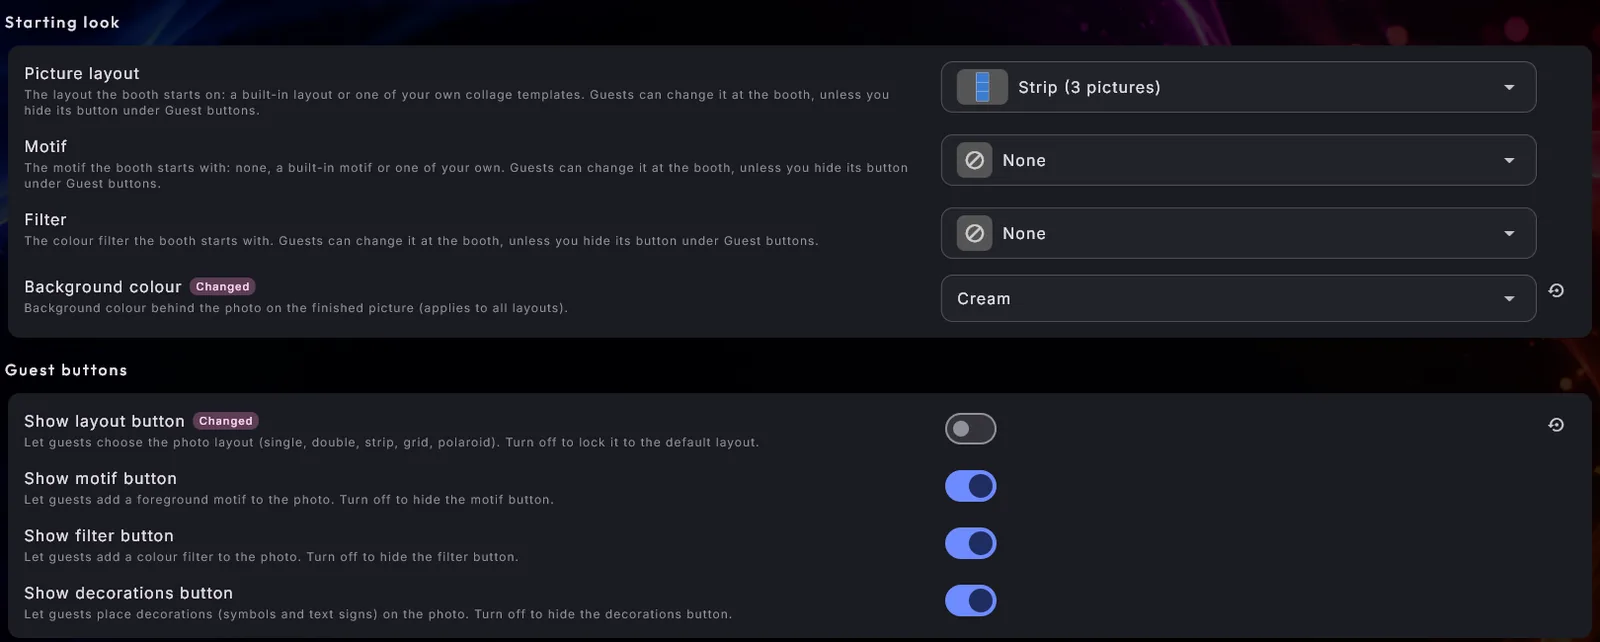
In Starting look, choose the Picture layout the booth starts on. For printing, the classic wedding choices are:
- Strip (3 pictures) - the photo strip, perfect on strip paper and in a guest book.
- Grid (4 pictures) and Two side by side - several poses on one print.
- Single picture and Polaroid - one picture with room around it.
- Collage templates - designed layouts with room for several pictures. A set of ready-made templates comes with the booth and appears in the same list as the standard layouts.
- Motion (animated) - a short animated picture that plays back and forth. It is great on a phone, but it is never printed.
You can also set the Motif and the Filter the booth starts with, and a Background colour behind the photos on the finished picture - White, Cream or Rose suit most wedding colour schemes.
Under Guest buttons, decide what guests may change themselves: Show layout button, Show motif button, Show filter button and Show decorations button. For a wedding it often works best to pick one layout that fits your paper and hide the layout button, so every print comes out the same size. Decorations - symbols and text signs guests place on themselves - are good fun and can stay on.
Step 4: Put the couple's names on every picture
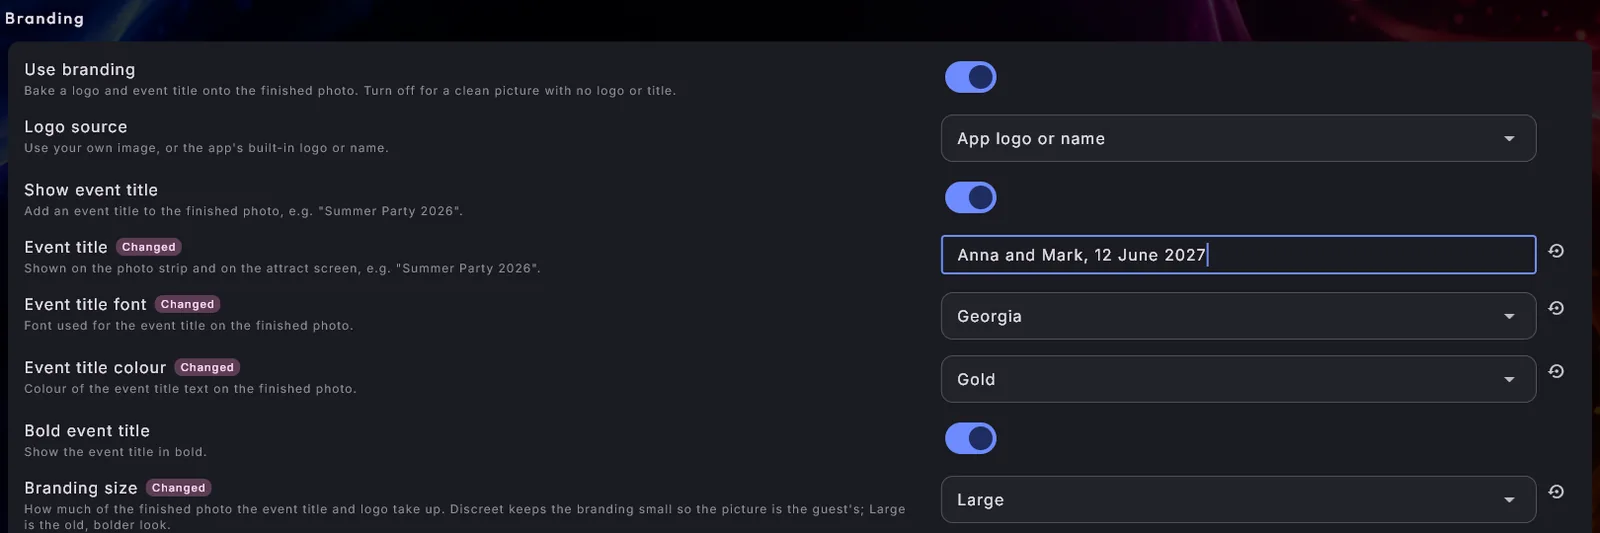
Open the Branding section and check that Use branding is on. Turn on Show event title and type the title in Event title - for example "Anna and Mark, 12 June 2027". It is printed on every picture and also shown on the screen that invites guests to step up.
Then style it to match the wedding: choose an Event title font, an Event title colour such as Gold or Dark grey, and Bold event title if you like. Branding size decides how much of the picture the title takes up: Discreet keeps the picture the guests' own, Large is bolder. On a collage template, Backdrop behind title and logo decides whether the title sits straight on the artwork or on a calm shape that keeps it readable.
Your own logo
Step 5: Set up printing
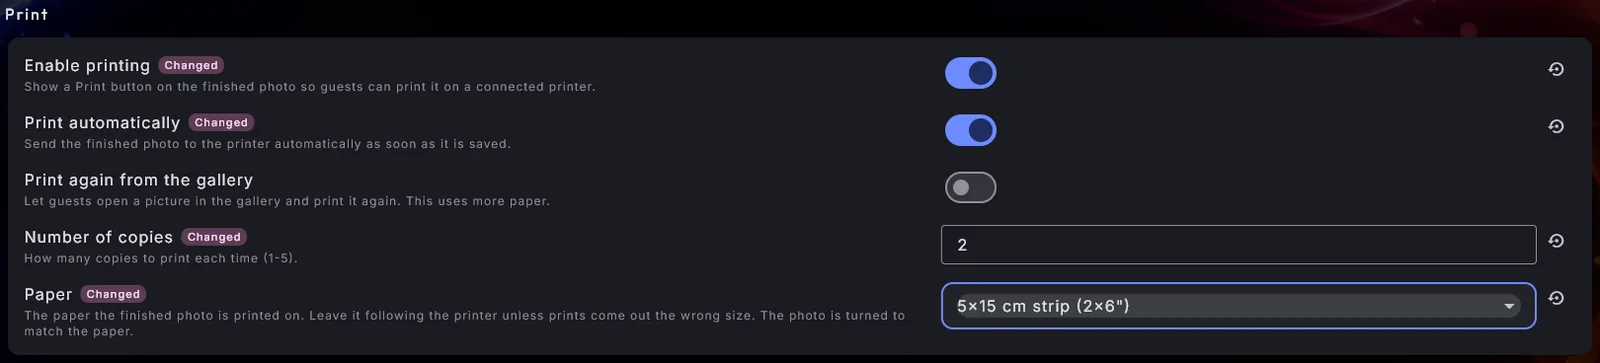
Open the Print section and turn on Enable printing. The finished photo then gets a Print button. Now choose:
- Printer - the photo printer. Leave it on System default printer if that is already the right one.
- Paper - Follow the printer uses the paper set up in the printer itself, and is the right choice unless prints come out the wrong size. You can also choose a size directly: 10x15 cm (4x6"), 13x18 cm (5x7"), 5x15 cm strip (2x6"), A6 or A4.
- Number of copies - 1 to 5 each time. Two copies of a strip means one for the guests and one for the guest book.
- Print automatically - sends every finished picture to the printer as soon as it is saved, with no button to press. This is the classic photo booth feel.
- Print again from the gallery - lets guests open an earlier picture and print it again. It uses more paper, so many couples leave it off.
The picture is never cropped to fit the paper; it is turned to match the paper instead. Printing happens without a print dialog, so nothing pops up in front of the guests.
Choose a real printer
Print a few test pictures with the paper you will use on the day, and check the colours and the size before the guests arrive.
Step 6: Let guests save the pictures on their phone
In the Sharing section, turn on Show QR code for sharing. After each picture, a QR code appears. Guests scan it with their phone camera and the picture opens in a small gallery in the phone's browser, ready to save and share - no app to install. This is also how guests take home a Motion picture, which is never printed.
The phone downloads the picture over the network the PC is on, so guests need to be on that WiFi. Put the network name and password on a small card next to the booth. The share link is meant for the evening, so tell guests to save the pictures they like before they go home.
Step 7: Keep the evening to this wedding
Two settings in The guest's session keep the booth tidy on the day:
- Show earlier pictures - which pictures guests see on the strip in the booth. Only today is the standard, so a booth used at another party never shows those pictures at this wedding. Only this session shows only the pictures since the booth was opened.
- Approve before saving - shows the finished picture with Keep and Retake before it is saved, so guests can try again before anything is printed.
Attract screen after (seconds) starts a slideshow of the evening's pictures when nobody has used the booth for a while - a nice way to draw guests over between the dinner and the dancing.
After the wedding: hand the pictures to the couple
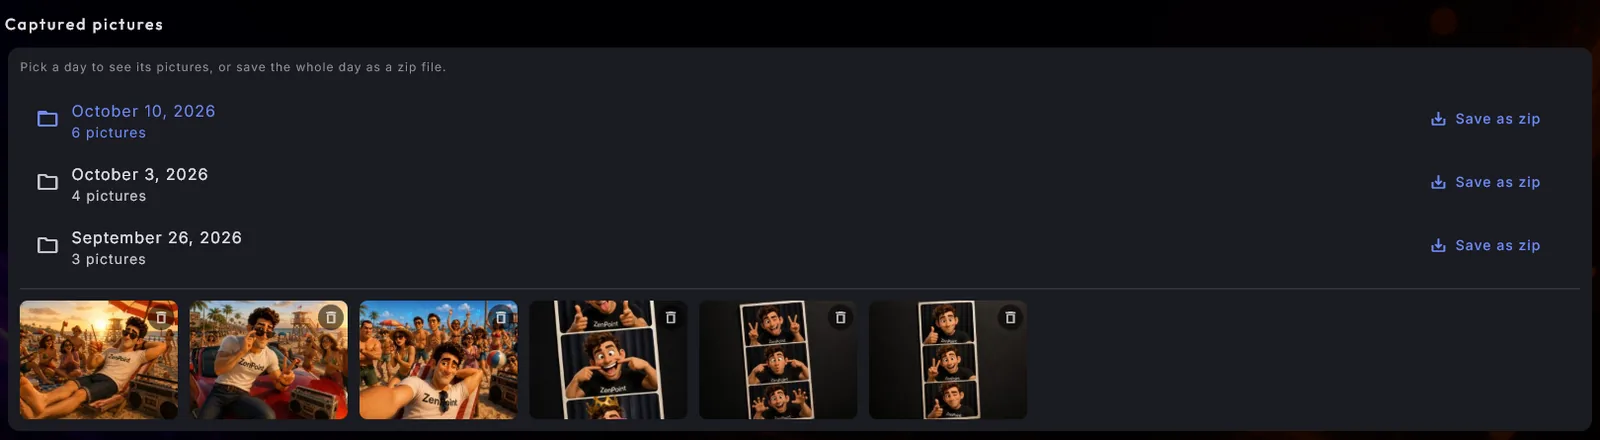
Every picture is saved on the PC. In Administration, Photo Booth, the Captured pictures section lists them day by day. Pick the wedding day and choose Save as zip to put all of that day's pictures in one file, then copy it to a USB stick or send it to the couple. Nothing is deleted when you save, so you can do it again later.
One PC for the whole party
Checklist for the day
- Webcam, light and backdrop in place, and a test picture taken.
- Printer connected, the right paper loaded, spare paper and ink at hand.
- Event title typed in and a test print checked.
- Print automatically and Number of copies set the way you want them.
- WiFi card next to the booth, and Show QR code for sharing on.
- Show earlier pictures set to Only today.
See more on the photo booth page, read how to set up a photo booth for a party, or start with the free 7-day demo.
Ready to try it yourself?
Download Digital Center and try every feature free for 7 days. When you are happy, it is a one-time purchase - no subscription.